


Be honest: have you ever Googled yourself? I think we’ve all been curious at some point to see what search results come up and what our Google reputation is like.
How about this…Have you ever Googled your business or brand? Maybe you were curious to see if your website comes up as the top search result. Maybe you wanted to see which pages of your website show up the highest in search results.
Good news: with Google Search Console, you don’t have to guess the answers to these questions (and more) anymore! Here’s why this tool from Google is awesome and how to set up Google Search Console for your business’ website.
Why you need Google Search Console for your website
Google Search Console gives you tons of helpful data about how your website is performing, such as…
- Where people see your site in search results (aka your ranking)
- How much traffic different search keywords bring
- Whether Google can access your website content
- How your mobile site is performing
- Total impressions (how many people saw your site listed in search results) compared to how many people actually clicked on your site
This data helps you figure out whether your website content is effective or if it needs some finetuning. It also gives you insight on what is working well for your site, so you can continue to head in that direction with your blog and other website content.
Along with providing you with lots of data, this data also gives you the opportunity to tell Google that a page on your site needs to be indexed or re-indexed. Indexing basically adds a specific page to the brain of Google’s Search Engine Robot, so that it includes that website page in possible search result options. Indexing (or re-indexing) is helpful if you have written a new blog post or if you have revamped a previously posted blog or page on the site.
How to set up Google Search Console
If you don’t have Google Search Console set up for your site, you need it! Thankfully, if you have a WordPress website, it’s really easy to set up. Here’s how to do it step-by-step…
Step # 1 – Log in to Google Search Console
You may be prompted to login via a sign-in screen, or you can click on the button that says “Start Now” on the Google Search Console homepage.

Step #2 – From the Drop Down Menu, click on Add Property
Once you’ve logged in, locate the drop down menu on the top left side of the screen. Click on the drop down menu, and then click on Add Property.


Step #3 – Enter your website URL
Once you’re on the Add Property pop up screen, use the “URL Prefix” side and enter your website’s URL. Then hit “Continue.”

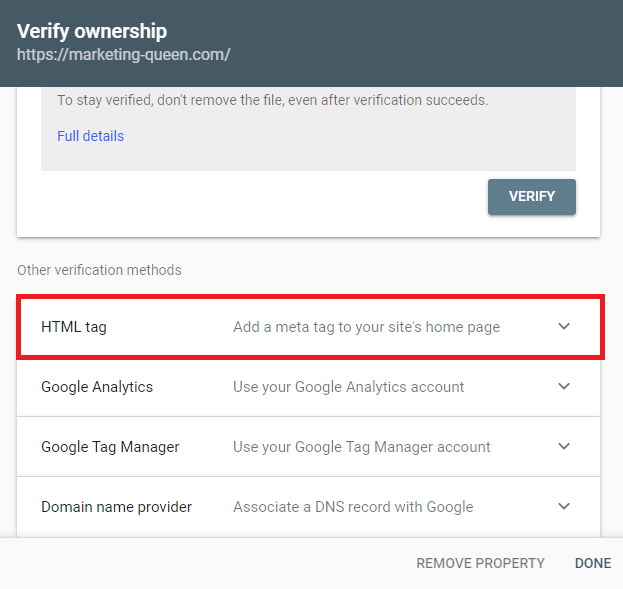
Step #4 – Verify ownership
The next screen is where you will verify that you own the website you’re trying to add to your Google Search Console account. It will look like this…

OPTION 1: Do you have Google Analytics set up? If so, YAY! 🎉You get to choose an easy path of selecting Google Analytics in the “Other Verification Methods” section. Once you click “Verify”, it should automatically connect your site.

OPTION 2: Just in case the first verification method doesn’t work, or you don’t have Google Analytics set up, here’s another easy way to connect your site with an HTML tag.
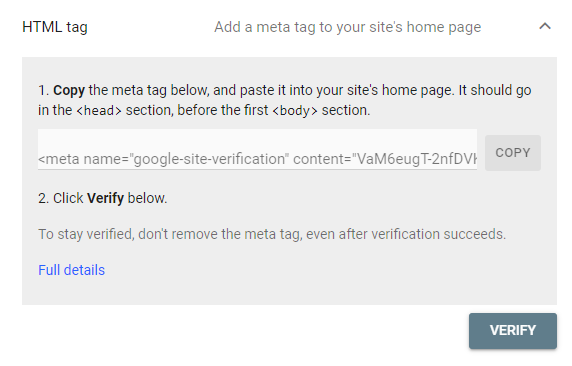
To start, scroll down and click the arrow in the HTML tag section.
Then, copy the meta tag.
Step #5 – Log in to WordPress
Login to your WordPress site, and select SEO. You can find “SEO” on the left hand side of your WordPress Dashboard.

Next, click on “General”.

Once you’re on the General page, click on Webmaster Tools. Locate the Google verification code section, and paste the meta tag from the Google Search Console verification page there.
Then, click “Save changes”.

Step #6 – Click “Verify”
Now, go back to the Google “Verify Ownership” window and click “Verify”.
*** Sometimes you will need to let the new code settle into your site. If the first time you verify it doesn’t work, try again in an hour or so.***
Once you’ve verified your website, check back soon for data!
Submit Your Website’s Sitemaps to Google Search Console
Now that you’ve added your site to Google Search Console, it’s time to submit your sitemap(s). Your sitemap is basically an index of all of the URLs inside your website. Don’t worry, using the YOAST SEO plugin on your WordPress site makes this super easy!
Why submit a sitemap…
Submitting your sitemap to Google helps Google find and understand your site easier. This helps your website turn up in search results. If you want to draw traffic to your site, you really need it to show up in search results!
How to submit XML sitemaps to Google Search Console
Step #1 – Select site from drop down menu
First, you’ll locate the same drop down menu on the top left side of the screen that you used previously to set up your site with Google Search Console. In the drop down menu, select the site you want to submit sitemaps for.
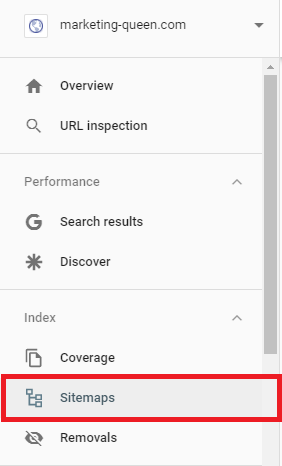
Step #2– Click on sitemaps
Then, lower on the left side of the screen, click on “Sitemaps.”
Step #3 – Enter your website’s URL + ‘sitemap_index.xml’ in the ‘Add a new sitemap’ field
Now, you’ll enter your website’s URL + ‘/sitemap_index.xml’ in the “Add a new sitemap” field.
Example: marketing-queen.com/sitemap_index.xml

Then, click “Submit.”
Next, repeat this step two more times: once for your pages and again for your blog posts.
- For pages, add ‘/page-sitemap.xml’
- For blog posts add ‘/post-sitemap.xml’
Ta-da! You’re done! You’ve successfully submitted your sitemap.
It’s analytics time!
Now that you’ve successfully set up your site with Google Search Console, it’s time to dive in to alllll the new stats you’ll get to see! Google has a wealth of analytics information that will help you know whether your website content is effective or not.
If you’re realizing that your website needs some updating or fresh content to be more SEO friendly, let us know if we can help!
Did you enjoy this post? Pin it for later…