


Want all the juicy details on what sources bring the most visitors to your website? How about which of your website pages are most popular? If you want the skinny on your website, move over Gossip Girl, Google Analytics has the latest scoop!
If you don’t have Google Analytics yet, you need it! Here’s how to set up Google Analytics in WordPress…
Why everyone needs Google Analytics
Google Analytics is where you can find statistics-galore about your website performance. It’s a really good tool to help you find out whether your website is doing its job: connecting you to your dream clients!
If people aren’t engaging with your site, you need to know. That way you can change things to more effectively appeal to your ideal clients. Google Analytics gives you very specific reports that show you exactly how and where people find your site, what pages perform the best (and worst), and so much more!
(You can always check out our other posts about Google Analytics to learn more about its amazingly useful reports.)
How to set up Google Analytics in WordPress
Before you can get access to alllll of Google Analytics’ awesome features, you need to link it to your site, so it can compile data about your website. You probably can already guess that we’re HUGE WordPress fans around here…so today we’re going to show you how to set up Google Analytics specifically for WordPress.
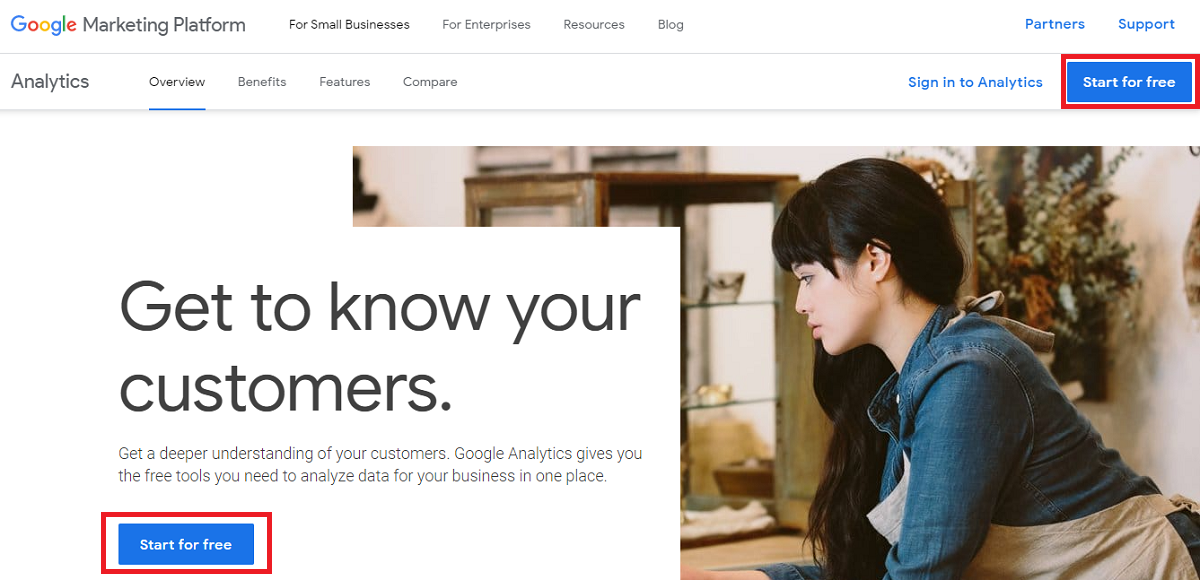
Step 1: Sign up
You’ll first need to create a Google Analytics account. You can do so here, by clicking on either of the “Start for Free” buttons.
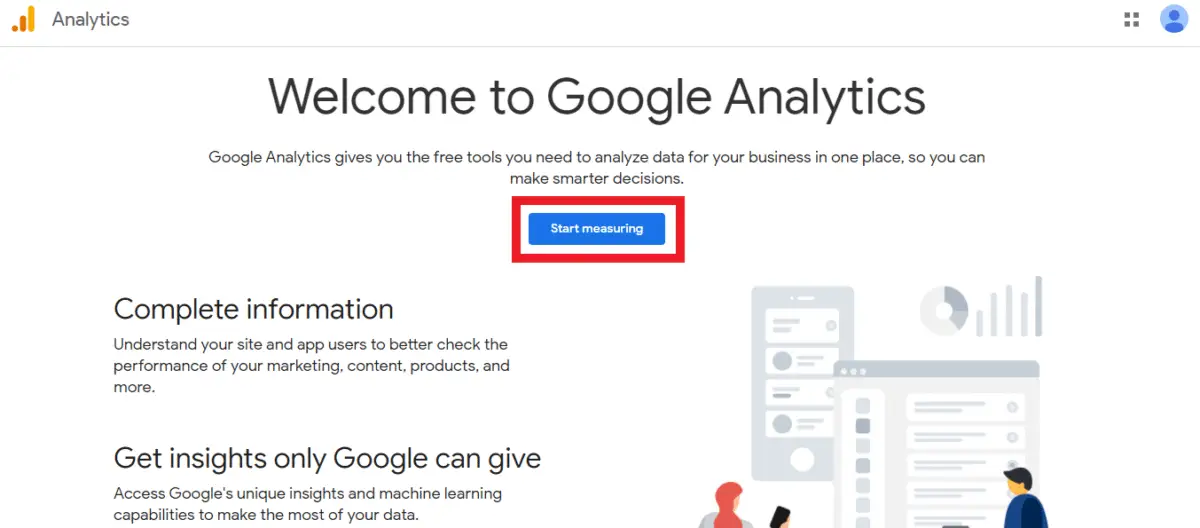
Then, on the next screen, click on “Start Measuring”.
Step 2: Create your account
Now it’s time to create your own Google Analytics account. You should now be on the “Create an Account” screen.
First, enter your account name. I recommend putting your business name. Ex: I’d put “Marketing Queen Consulting”
Then, hit “Next.”

You’ll notice that below the “Account name” section, there’s a portion about data sharing. I recommend checking all of these boxes, as it will give you access to more reports (aka valuable info about your site) than if you don’t enable those options.
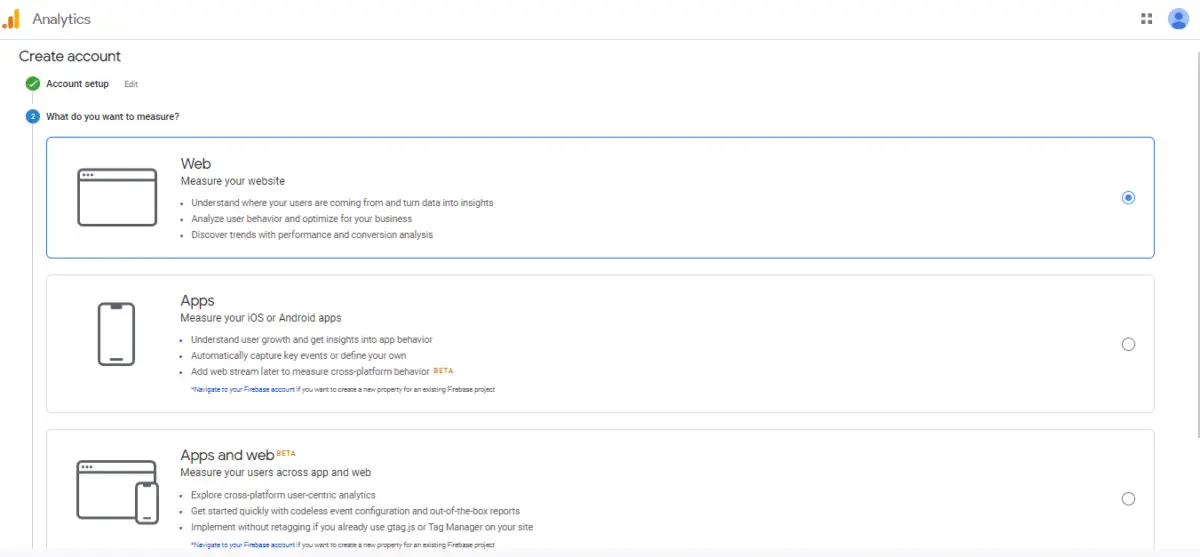
Now, you need to select what you’re measuring. You can choose a website, mobile site, or both! I recommend starting with just Web for now (and that’s what we’ll be covering for the rest of this post). Then, hit “Next.”
Then, enter your website name + url.
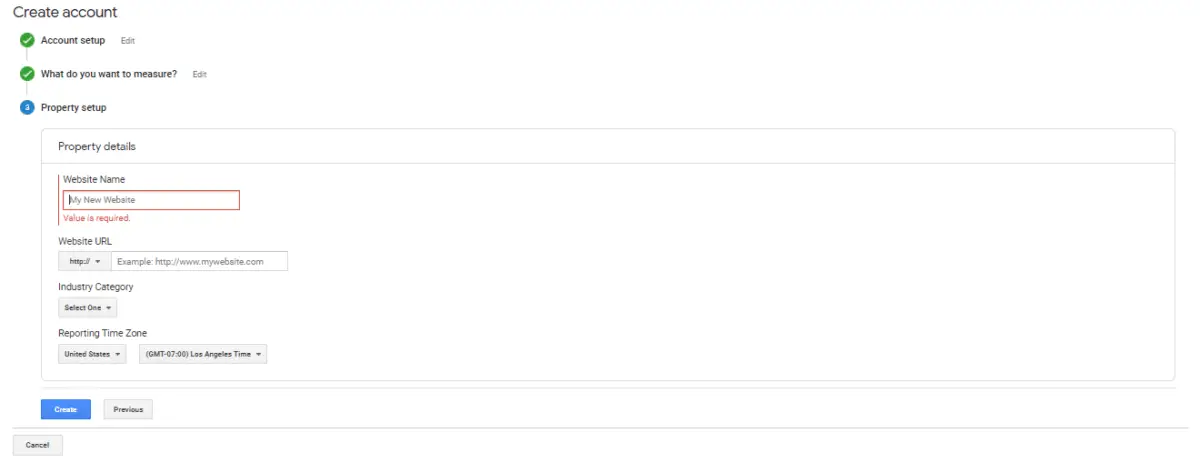
On this same screen, enter your Industry Category and Reporting Time Zone. For the Reporting Time Zone, you’ll likely want to choose the time zone you live and work in. However, you may want to consider choosing the time zone your clients live in if it’s wildly different than yours (Example: maybe you live in Virginia and your clientele mostly lives in South Korea)
Then, click “Create” and review and accept the term agreements.
Yay! You’ve set up your Google Analytics account. Now we’re going to link your account to your WordPress website.
Note: most WordPress themes already have a place where you can insert your Google Analytics account number. Make sure you check whether your WordPress theme has this capability before beginning Step 3. If you can add your Google Analytics account number to your theme, you can skip Steps Three, Four and Five of this post.
Step 3: Create a Monster Insights Account
If you do need to add a Google Analytics plugin to your WordPress site, go to www.monsterinsights.com
Create an account by clicking on “Start here.”
Then, you’ll be prompted to choose the plan that best fits your business needs, and then enter your payment information. For those of you who don’t want to pay for a plugin and don’t mind having access to less data, there is a good free version of the plugin, called Monster Insights Lite. However, word on the street is that all of the cool kids are opting for the Pro or Plus paid versions, which come with tons of awesome features and data reports.
Step 4: Add a Google Analytics Plugin in WordPress.
Next, login to your WordPress account. On the left side of your dashboard, locate where it says “Plugins” and click on it.

Once you’re on the Plugins page, click on “Add New”.

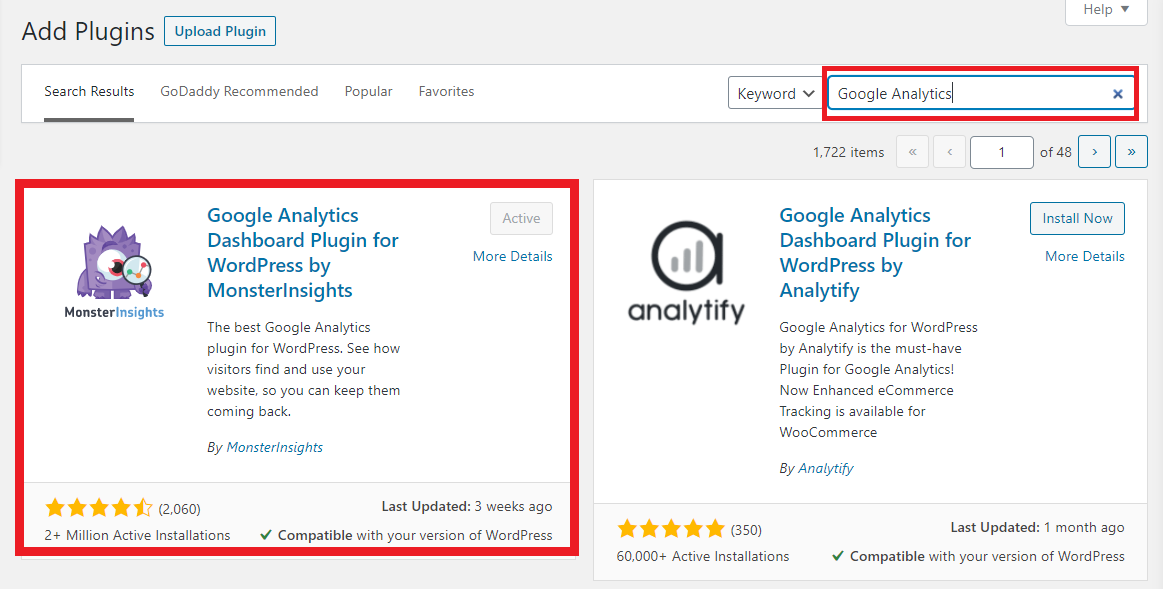
On the Plugins search page, type in “Google Analytics” in the search bar on the top right of the screen. Once the search results appear, you’ll see there are many plugins to choose from. We personally love and use Google Analytics Dashboard Plugin for WordPress by MonsterInsights. The rest of this post will include instructions on how to install this specific plugin.
Step 5: Install the plugin
Once you’ve located the plugin you want to use, click “Install Now”. This will be in the top right corner of the box of the plugin you’ve selected. After the plugin has installed, click on “Activate now”. WordPress will then lead you through the plugin set up process.
You will…
- Select your business category
- Enter your license key. You can either find this at www.monsterinsights.com or in your email receipt for your MonsterInsights purchase. Click on “Connect MonsterInsights”.
- Then, select a Google Analytics account to link to this plugin.
- Select the permissions you want MonsterInsights to have access to with your GA account
- Finally, select the specific website you want to connect to.
From there, you can adjust some additional recommended settings and addons if you’d like.
Step 6: Analyze your website data!
After creating your Google Analytics account and adding your plugin, you can start reviewing your website’s analytics! You can do this via your Google Analytics dashboard and your WordPress dashboard, too.
Our Marketing Queen team typically prefers using the Google Analytics dashboard, and you can click here to read about which reports are best to get started with.
Now you know how to set up Google Analytics in WordPress!
Setting up Google Analytics is one of the best decisions you can make when it comes to being strategic with your website and digital marketing efforts. It’s one of the best tools that can guide your digital marketing, since it shows what’s working and what isn’t. We love that clarity!
So what are you waiting for? If you don’t have Google Analytics yet, GET IT NOW! We hope this post shows you how easy it is to set up for a WordPress site. If you’d like help tracking your website’s analytics or figuring out what to do with this data, let us know if we can help at all!
Did you enjoy this post? Pin it for later…