

* This post contains affiliate links
There are more project management apps out there than Starbucks coffee combinations (personal favorite: Grande Salted Carmel Mocha with an extra shot, and make it hot!). But we want to give the Marketing Queen seal of approval to Airtable. 👍☑️
We actually use a combination of project management apps. But I love it when Airtable is THE answer to a project at hand. (More on that in a bit.) Its organizational abilities can be as simple or complex as you need and can be colorful. We always say YES to colors at Marketing Queen.
This article touches on the following points:
- When should you choose Airtable over Asana (or other project management app)?
- The AirTable Basics
- AirTable Templates
- Customizing AirTable
- How I Use AirTable – an example
- Selector Fields in AirTable
- Sorting and Filtering Data in AirTable
- Grouping Data in AirTable
When should you choose Airtable over Asana (or other project management apps)?
The short answer: It depends on the project you’re trying to organize.
Asana, for example—which we also adore—is just a project manager, plain and simple. However, Airtable is a data organizer that can be used as a project manager.
The Airtable website says: “Unlike a traditional spreadsheet or project management system, Airtable gives you the power of a super-flexible database to connect your information—and design the perfect workflow—all in one place.”
(A lot of people like Airtable because they want to analyze data. AT is great for that, yes. However, we don’t use Airtable that way here at MQ, so we won’t be going into that in this post.)
When I need a more robust spreadsheet to help me manage data—and more importantly, VISUALIZE the information—Airtable is the choice for me.
I’ll show you what I mean. Let’s dive in!
The Airtable Basics
So you know how spreadsheets are awesome? (They are, don’t fight it.) Now imagine a spreadsheet with fields that can contain more than text. Think: photos, attachments and files, conversations about the files or the status of the information within–all within a single field.
That’s even MORE awesome, don’t you think? That’s Airtable.
Keep that capability in mind while we go over some Airtable-specific terms.
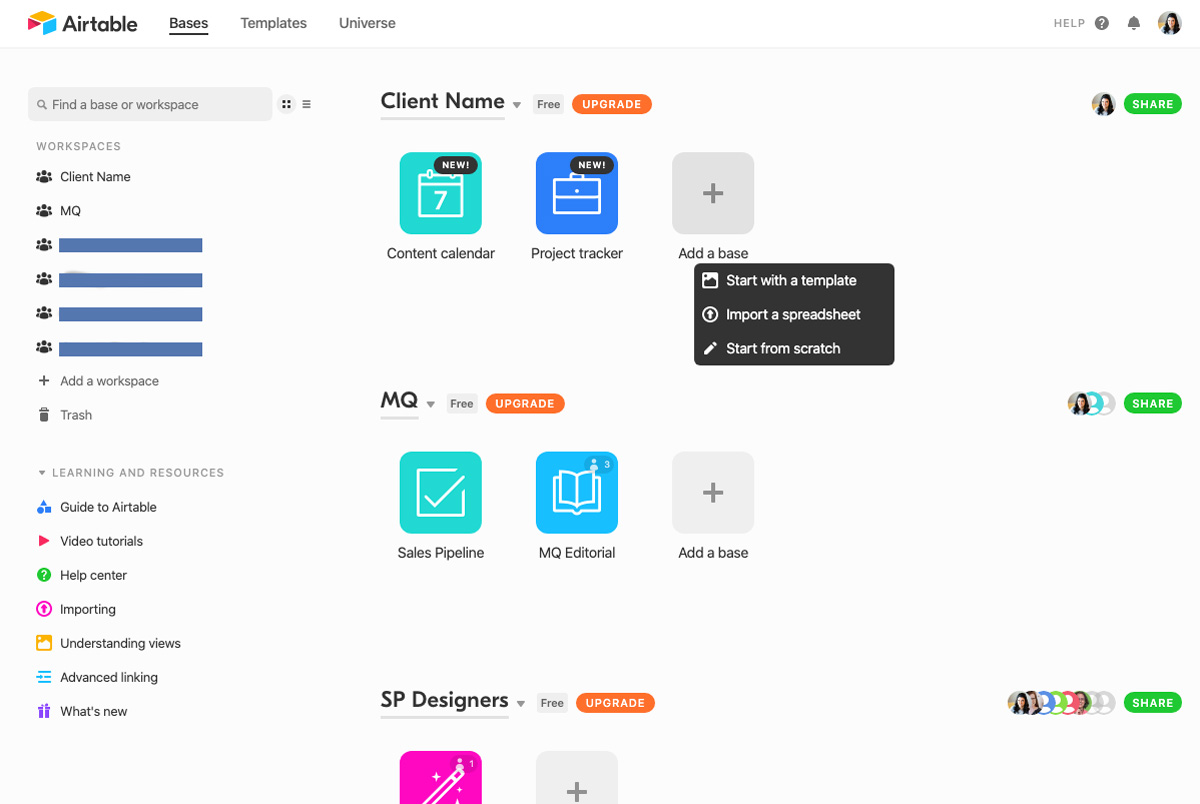
- A Workspace is a group of Bases. What is a base, you ask?
- A Base is a file. (Database, get it?) Each base is represented by a colorful (yay!) icon. See how they’re grouped in the image below? They’re grouped into Workspaces.
An example of a base could be a sales pipeline, a customer relationship management system, a workflow, anything really.

Before you start: There are templates!
Now that you know the terminology, you’re ready to start using Airtable! And you start by creating your very first base.
You could create a base from scratch…or, you could use one of Airtable’s really smart, done-for-you templates.
If this is your first base, I would highly recommend diving into those templates. Why? They give you a good starting point for creating your own custom base, and they have example workflows already built in.
There are hundreds of templates all designed for specific use cases. There are templates for an editorial calendar, event planners, sales pipelines, etc. But they don’t have to be all business. Airtable even has a model ‘sneaker collection tracker’ and we love them for it.
Pick a template and open it up to find out what’s inside. They do a good job of explaining the logic behind the template as well as its capabilities. They have even embedded a sample Airtable (that uses the template) so you can scroll around and look at it before fully importing it.

ADVANCED TIP: When you’re a little more familiar with Airtable, you can think outside the template box. Just because a template is called ‘Video Production’ for example, doesn’t mean it can’t be used for something entirely different. You may be able to use the bones of the Video Production template to create a base about your particular products or services.
Just remember: no matter what template you choose, you can customize everything about it.
To template, or not to template?
Should you use a template? You certainly don’t have to.
There are three other ways to create a base:
- Enter the Airtable Universe! This is the name of the Airtable user community. The universe is filled with ideas and bases from users all over the world. Users post their tables for others to copy and use.
- CSV Import! Import a spreadsheet of existing content. This could be a CSV file that you exported from spreadsheet software (say, Microsoft Excel) or from another project manager (think Asana, Trello, etc.)
- From Scratch! Maybe all of these various templates have inspired you to know exactly what you want and a blank slate is a perfect place to set that up.

Let’s start using Airtable!
Now that you’ve created your first base (from template or scratch), let’s look around.
Customize the look of your base (from the outside)
Name your base, give it a color (oh là là!), and change the icon to something visually descriptive or fun.

Customize your base (from the inside)
Open up that base and you’ll see a grid with some tabs along the top. This is the ‘Grid View’ of your base. Each tab is a separate table inside of the base, and each table is like a sheet inside of a spreadsheet file. (See image below.) Each base needs at least one table, but of course you can have many more.

There are more Airtable-specific terms to know:
- Fields: These are the columns inside of a single table. (A little different than how they’re defined in an ordinary spreadsheet.)
- Records: These are the rows inside the table. Each record contains nuggets of information, which are the cells going across – one per field (column).
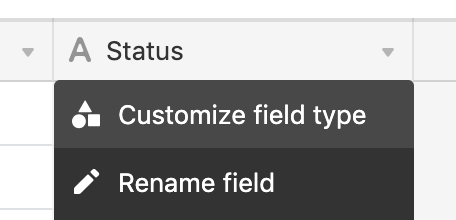
These fields (columns) can contain information in different formats. Basically, they can contain plain text, or they can contain more (and be a little more fun!). You can decide what type of information to include by selecting the Field Type. There are a few different kinds, including short or long text fields, attachment fields, select fields, dropdown fields, and more. See all of them and their descriptions here.
Here’s how I use Airtable (example inside)
(For some of you, this might be a throwback to the days to Microsoft Access – the database program.)
As an example, let’s work with one of my own Airtables. Here’s a base I use to help me keep track of my blogs and content marketing. It’s rudimentary but oh-so-helpful.
Aside from the first field being the name of the post, I then created a few more fields (see columns across the top of the table). I made the first one into a “single select” Field Type to showcase the Status that applies to each record.. There are also some fields that I type into, and a few fields that also offer a single select dropdown.
Which brings us to the MOST exciting part of Airtable
The most exciting part of this is how you can add attachments to a Record (Row)! You just need to format the column as an “Attachment Field.” Even better, you can add attachments through the magic of drag-n-drop. In my example, I upload the Featured Image file here for each blog post.
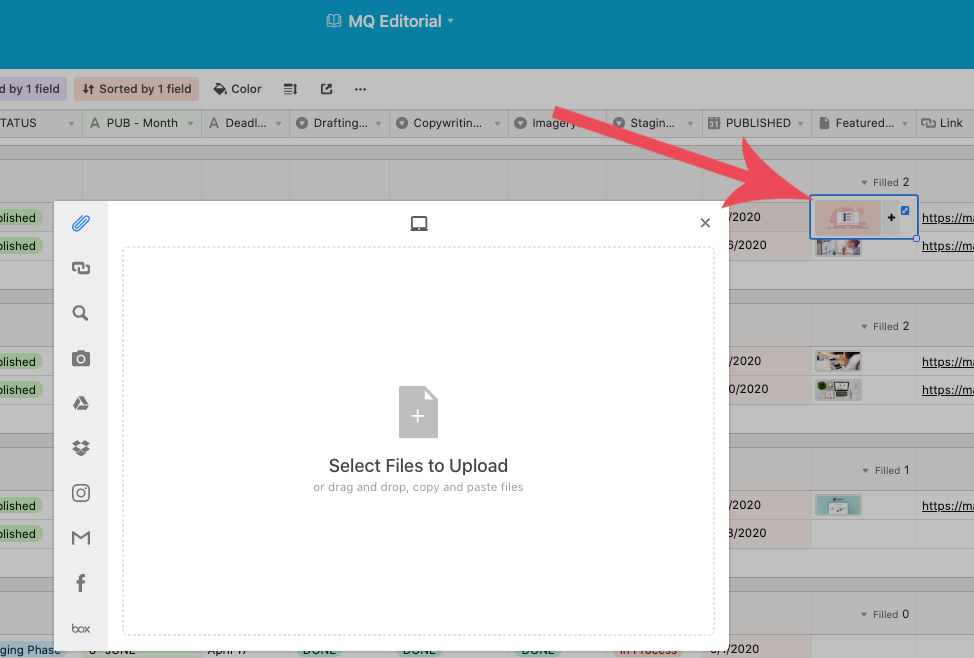
I personally like to think of each Record (Row) being an index card filled with information from each field. The information on the index card is then shown horizontally across the rows in the grid view – one row for each field of information.

You can see all the details of the record in a “card” if you simply click the expand tool on the far left of the row.
If you’d like to edit anything in this view, have at it, my friend. The card even contains information about all of the changes that have been made to the card (now that’s smart). Look in the right-hand column entitled “Activity.”
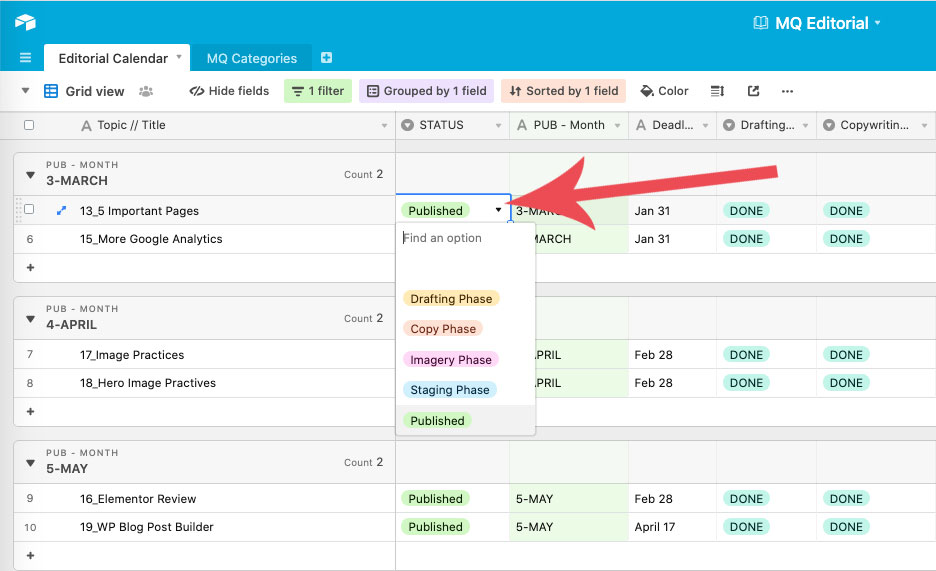
Selector Fields Gettin Crazy … Crazy Cool
Let’s say you want a field to be an easy drop-down or a multiple-choice option. You can do that too!
You can simply type in the options into a Single Select field type or Multiple Select field type. Easy Peasy!

BUT LET’S GET CRAZY FOR A MINUTE.

(Sorry, Bon Qui Qui…we ARE going to get crazy.)
What if you wanted to be able to:
- Select a choice for the record AND
- Also take a collective look at which records have selected that choice AND
- Then add even more details to the selection option
That’s when you:
- Create a new table for those options and
- Do a little cross-referencing
To cross-reference, you will choose the Lookup field type in your original table, and look up the records (AKA options) in the new Table. Confused? I hope this screenshot helps. You can see in the left screen that I have a field called Categories. It is currently looking up a list of options based on the 2nd table called “MQ Categories” (see bright coral arrow). I can choose as many categories for the record (or post) that apply.

As I do that, the “MQ Categories” table (see light coral arrow) is also updated showing me how many records have that category option applied to it, and which ones are considered to be in that category as well (see teal arrow). For this particular Base, this functionality allows me to see what categories I have been posting too much about, and which ones need some more love.
Last but not least, I wanted to show you two fun ways to see your data: filtered and grouped.
See Your Data Option #1: Filter Down Like a Pro
Let’s say you would like to see just a few fields that apply to a particular query. To do that, you can filter it via the settings along the top of your spreadsheet:
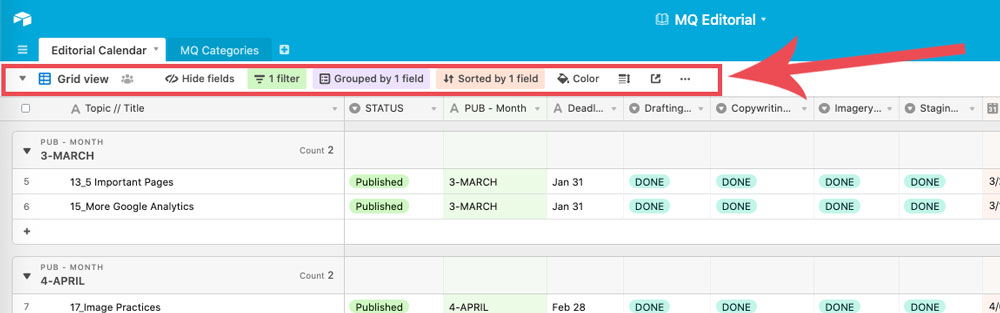
Not only can you filter by one field of your choice, but you can keep going and really narrow down your data.

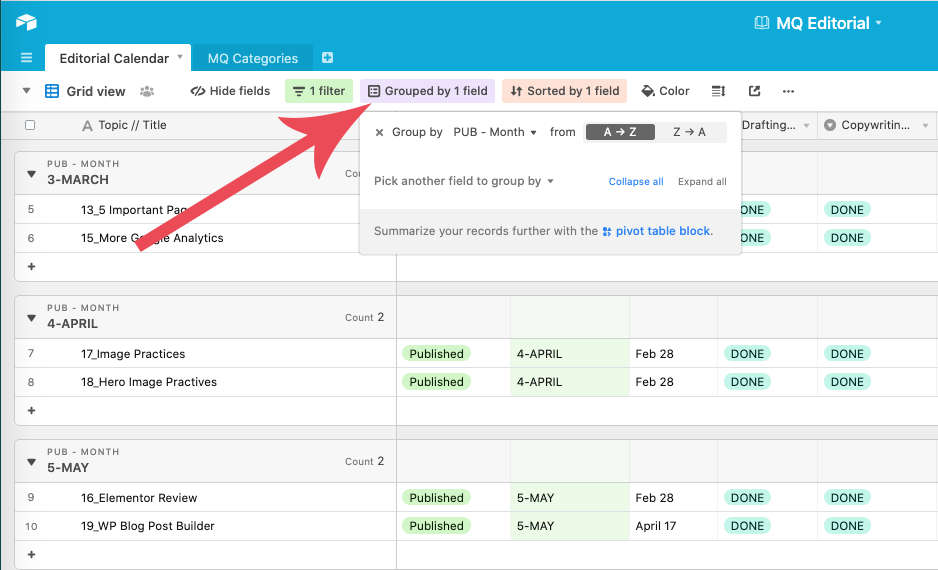
See Your Data Option #2: Group Your Records (the MQ favorite)
My personal favorite way of seeing my data is to use the Group Tool. You’ll find that in the same settings bar as the Filter Tool.
Click the “Group” button and select which field you’d like to group the fields by. And, then you can group within the top group…. Gettin’ fancy over here!
Once your data is grouped, you can expand or collapse items you do/don’t want to see in that moment.
Make Airtable Your Own!
This is only just the beginning of what Airtable can do for you, my friend. I hope you’ll say yes to Airtable and all of its powerful functionality–and the colors, too.
Now, if you say yes, but aren’t sure where to start? I set these up for clients all the time via my Strategy Intensives (hint, hint). I absolutely LOVE setting these up and seeing clients discover how helpful this tool can really be.