


Images (photos and illustrations) are so important for content. They do more than just please the eye. They enhance the message in your written text! According to this study, people remember 80% of what they see but only 20% of what they read. Proof that a picture is worth 1,000 words, no?
So, you definitely want to include photos and graphics in your content marketing. But there’s a catch. You have to use them correctly. The imagery should improve the experience and not slow it down or make it confusing.
These are the eight steps Marketing Queen recommends for optimizing photos. That may sound like a lot, but it doesn’t take long to get them down to a habit. You’ll be using images like a pro in no time at all!

#1 Choose the right image
At first this might sound a little strange. Can there really be a “wrong” image? Well…yes. Any of the visuals you add to your blog post or webpage should enhance the meaning of your text on that page.
For example, let’s say you write a blog post about the different types of wedding veils. Your audience will be expecting photos of wedding veils and not, say, a photo of the sushi you had for dinner last night. That would just be strange.
Now, you probably know not to include a photo that’s that ill-matched to the content. But consider this. If you write a blog post about wedding veils, but then include lots of bridal photos that don’t really show the veil…from your reader’s perspective, you may as well be sharing a photo of food! Yes, it’s that confusing to your reader, who is only trying to figure out which veil to choose for her wedding.
Choosing the right photo = choosing a photo that makes sense with the topic and reinforces your expertise.

#2 Make sure your image is in the right format
There are a lot of different file formats for images. Most commonly there are JPEGs, PNGs, and GIFs. You can usually tell which format your photo is in by looking at the file extension.
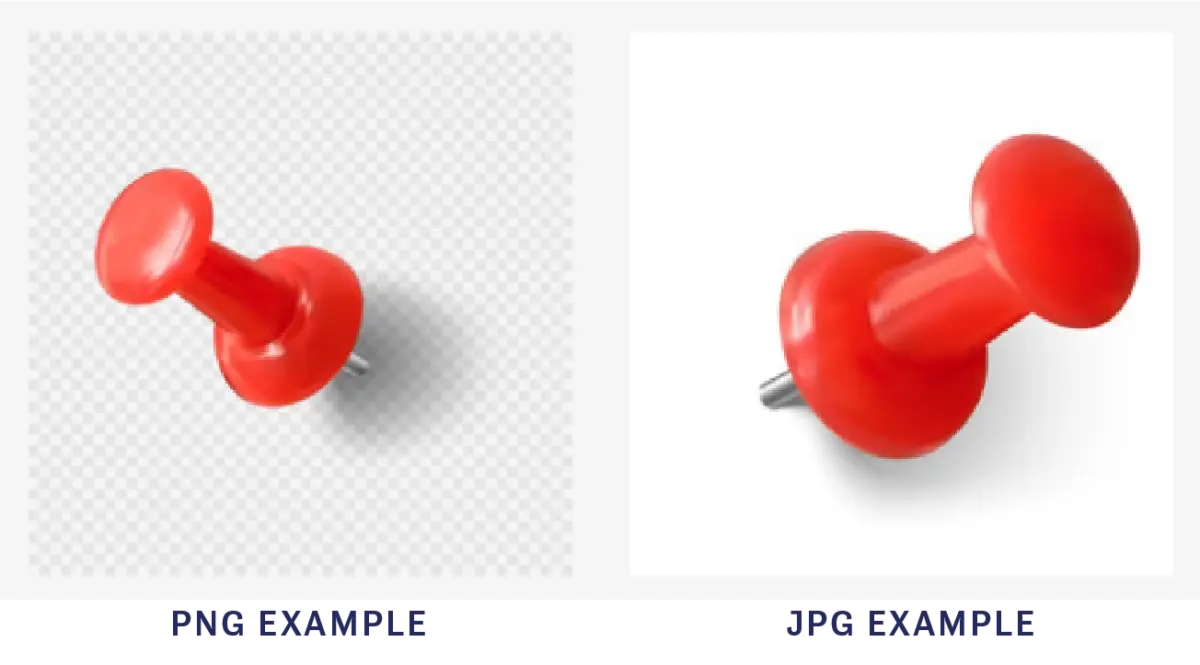
When it comes to blog and social media posts, a JPEG is your best bet. PNGs are fine if you need a transparent background for your photo, like a floating logo or object. (And we can’t begrudge you the fun of the occasional animated GIF!)
#3 Make sure your image is the right size
So, now you have a JPEG that matches your content. Hooray! But. Any old JPEG won’t do, however. Your photo needs to have enough pixels so that it looks good. We’ll borrow from another one of our blog posts to explain:
…imagine a blanket that’s 4 feet by 4 feet. When someone knitted that blanket, they used 8 packs of yarn. When the blanket is this size it looks great and keeps you warm because the yarn is packed tightly together. But when you stretch it out to 6 feet by 6 feet, you can see the holes and it stops looking so warm. Stretch it even more and it looks more like a net than a blanket…Only blankets made from a lot of yarn can be stretched without becoming useless.
Image files are a lot like this! But instead of yarn, they’re made of pixels–the microscopic color building blocks of an image.
If your image file doesn’t have enough “yarn” or pixels, the picture will be blurry–which will look unprofessional! If you try to stretch a photo with only 400 pixels in width, it will look very blurry.
On the other hand, you CAN have too many pixels. Most photographers give us high-resolution images that are 4,000 pixels or more in width. What’s wrong with that? Well, the more pixels, the bigger the file. And the bigger the file, the longer it takes to load the image. Your readers simply aren’t patient enough to wait for your photos to load. They want them now, now, now!
Typically, the largest screen size your readers will use is 1920 pixels in width. You don’t need more than 2,000 pixels. For blog posts and most website layouts, images of 1,000 or 1200 pixels are just right.
TIP: What if you’re stuck with smaller images that you absolutely must use? Make a collage! If you have a few smaller images, make a collage of images that could together equal the full-width of your layout. Also, if you have a super tall photo that’s the right width, it might still look odd on the page. Instead, put 2 such images next to each other and they’ll be much more pleasing to the eye. BlogStomp is a great tool to size, compress, collage, and name your photos!

#4 Compress your images without compromising quality
Okay, once you have the right number of pixels, now you need the right “weight” for your photo. When you compress a photo, you remove unnecessary data and pixels from the photo. That can reduce the file size from 5MB to 150kb, for example. Just like fewer pixels means faster load times, so does smaller weight!
Use an online compressor like https://compressjpeg.com/ or https://tinyjpg.com/ to compress your photos to an ideal size. But, you’ll want to make sure your photos aren’t too skinny. Some images look blurry when too compressed. A good rule of thumb is to make sure your photos aren’t smaller than 100kb in size.

#5 Name your images appropriately
When I’m talking about naming your images, I’m talking about the name of the file itself. Your file name should be descriptive of what the photo actually is. Instead of “IMG4777.jpeg” use “Exchanging-Rings-Wedding-Vows-Outdoors.jpeg.” Keep the file name to 2-6 words and use hyphens. This does so many good things for you:
- Keeps your website ADA-compliant, because it helps your readers with low vision know what the photo is about.
- Boosts your SEO, because the words used in your photo names add relevant words and keywords to your website. Collectively, search engines will see what content (text and imagery) you are sharing consistently.
- Makes your image searchable in your own image gallery, so it’s easier for you to find and reuse it later.

#6 Add Alt Text to your images
Once you’ve found the right images and optimized them, it’s time to upload them! Once they’re in your WordPress media gallery, there are a few more details to add to enhance your images. The first one is to add Alt Text.
An “Alt Text” attribute is simply an additional piece of data that describes your image. This is the cherry on top of all of your content marketing efforts. Why?
- If your image fails to load, no problem! This text will show in its place. So, your reader will still know what you were going for.
- If your reader is on a desktop device and hovers over an image, the Alt Text is displayed near the cursor. So, your reader will have additional information.
- If your client has low vision, the Alt Text will be read to them so they know what you were going for.
- Search engines will see that Alt Text as another piece of information about your website. This boosts your SEO, too!
The same rules for naming your image file apply to adding your Alt Text. Make sure the wording is in plain English and descriptive. But don’t just add a list of keywords, either. Search engines are getting smarter; they’ll see right through this spamming technique. You’ll also do a real disservice to the people reading your website.
Not sure what to use for your Alt Text? W3C has a great tool to help you decide. It’s a little techy, but once you get familiar, you’ll probably love it as much as we do.
Related: ADA Accessibility for Your Website – Here’s What You Need To Know
#7 Adjust your layout
Now that you’ve uploaded the image and added Alt Text–it’s time to insert them into your post! This is when you’ll want to make sure your images “look good” in your blog post. It’s especially important to do this when your post contains multiple images. Your readers don’t want to scroll endlessly through images that don’t have a lot of content between them.
Before publishing your post, preview it and use your best judgment about what looks right. If you have a lot of images, you might want to consider using an image gallery or a carousel of images.
#8 Don’t forget to set your Featured Image
WordPress gives you the option of selecting a ‘Featured Image’ for each of your blog posts. Don’t overlook this opportunity to attract attention to your post when you’re sharing it! You want to pick a photo that best represents your post and your brand–and it should entice people to click the link to read it.
The Featured Image shows up as part of a link preview when you share it on social media. For example, when you post a link on Facebook, Facebook automatically grabs the image you’ve selected. (But if you don’t select an image, it will choose one for you–and quite often, it’s just your logo. Not exactly something that makes people want to click!)
TIP: Choose a photo that’s in landscape (horizontal) orientation so you don’t get a strange crop on your image when it’s shared. Most times the crop is based on the center of the photo.
————————————
These 8 steps for including images on your blog only require a little bit of elbow grease. But it’s worth it! You’ll please your readers and search engines with your image-rich posts.
Do you have any tools you like best for optimizing photos? Which ones do you prefer? Here at Marketing Queen we’re always eager to add to our (ever-growing) list of photo optimization apps!
Featured image was provided by Pemika / Adobe Stock.